Not known Facts About Vancouver Countertop
Table of ContentsOur Vancouver Countertop PDFsNot known Details About Vancouver Countertop Not known Details About Vancouver Countertop The 6-Second Trick For Vancouver CountertopThe Definitive Guide to Vancouver CountertopVancouver Countertop Fundamentals Explained
A word of cautioning right here: If you have a U-shaped cooking area with 2 large miters and have never mounted counter tops prior to, you may intend to hire a pro. Setups like this require you to scribe three wall surfaces at one time. But if you have just one inside edge as we did, the project is well within the skill level of the average do-it-yourselfer.
To fit our style needs, we picked square corners for all our sides. If you desire any rounded edges on exposed edges, review this with your provider in advance of time and ask to see sample accounts.
The smart Trick of Vancouver Countertop That Nobody is Talking About
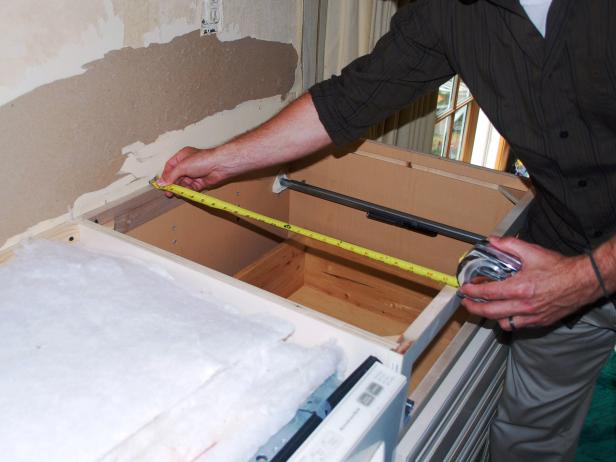
If your sink is not symmetrical, make use of a template. Mark around the perimeter, then mark another line 1/2 in. Photo 9: Pierce openings inside the template, Drill 1/2-in.
You can begin with any type of section of countertop, yet it's ideal to begin with the lengthiest edge area due to the fact that the various other sections typically sign up with or connect to this item. Our long section had a variety of fitting challengesespecially the corner. To get an exact scribe to the wall right here, you need to temporarily sign up with the edge (Photo 5).
Not known Incorrect Statements About Vancouver Countertop
Next, sand down the back edge (Photo 7) of the backsplash to your scribe line with a belt sander. Idea the belt sander slightly to undercut the backsplash for a tighter fit. Establish the countertop back versus the wall surfaces and inspect it for fit. It ought to fit on have a peek here the first try, yet you might require to do some added sanding for a limited fit. Vancouver countertop.
After the hole is reduced, established the penetrate the available to check the fit. Do a bit of cutting if it binds as you drop it in. Make use of a handsaw to reduce the countertop to length, Picture 11: Utilize a handsaw to cut the counter top, Cut the end of the countertop with a sharp 10-tooth-per-inch handsaw.
Photo 13: Caulk the miter joint, Squeeze a grain of siliconized acrylic adhesive caulk onto the side of each Recommended Site miter joint and after that fasten the counter top sections with each other as in the past. Make sure the tops are flush as you tighten the bolts. Before we can assemble the miter joint, we needed to cut the short area of the countertop exactly flush with the cupboard end (Photo 11) to include the range.
The smart Trick of Vancouver Countertop That Nobody is Talking About
A sharp handsaw will give you a nice, sluggish, controlled cut as well as time to react if the cut is straying from your mark. Use a typical saw that reduces as you push the blade away from you.
Make certain you've made a square side. Next, glue a build-up strip to the lower flush with the recently cut edge as well as clamp it in area.
Make a pair of method cuts with a laminate cutter (Photo 12) prior to you attempt the real point. read what he said Rating the top several times to cut through the laminate, making use of a straightedge as a guide.
9 Simple Techniques For Vancouver Countertop
Use this readying to scribe the left side of the top for the return. Image 15: Mark the left side of the kitchen counter, Scribe the left side of the top, after that cut along your mark with a handsaw, leaving the leading edge to snuggle around completion panel as well as develop a notch return.
Use contact adhesive on the exposed notch edge and also on a small piece of laminate. As soon as the adhesive is completely dry to the touch, press the laminate item in position and also submit the side for a clean, specific fit. You might not need to make a "return" cut in your kitchen counter like the one displayed in Photos 1416.
long No. 8 screws. For a limited fit, screw the angles to the closet first and also after that attract the top to satisfy the steel angle with the second screw. Picture 18: Caulk along the backsplash, Pull the tinted silicone caulk tube nozzle in one continual activity along the joint between the backsplash and the wall surface.
The 9-Minute Rule for Vancouver Countertop